
If you’re suddenly working from home, organizing your files may be one more challenge that you just don’t need.
A good filing system keeps everything organized. You can find what you need when you need it and can recover it when something happens to the original. The system I’ve been using for Right Touch Editing was developed by trained archivist Paul Lagasse, of Active Voice Writing & Editorial Services, and has helped keep my client files findable, even once I’ve archived them.
Lagasse’s system is divided into three parts: before a project begins, during the project, and after the project is completed. You’ll spend the most time setting up a new project, but once you have, you’ll put in minimal effort to stay organized.
You’ll want to apply this structure to email, electronic folders, and physical folders.
Launching a New Project
Start with your email program:
- Create a folder for every client or project. Create subfolders for the client projects or subprojects.
- Add all contacts for the client/project to your contacts list. Fill in all the information you can, including any important notes.
- Create a group for the client’s/project’s contacts.
- Assign a color to the client/project. This might be flags, folders, or labels, depending on your software.
- Create rules or filters. Allow your email program to put all mail into the proper client folders.
Next, create client or project folders on your desktop. Whatever color you assign to the client follows through to your e-folders and physical folders.
Get writing advice straight in your inbox.
Sign up for Right Touch Editing’s emails!
Let’s say you’re working revamping your company’s website. You call the folder “Website Revamp” and make the folder blue. Your email label, top-level e-folder and any physical folders should all be blue. (Windows users can download software that will color e-folders.)
Within the project’s main folder, you’ll create another series of folders, which can be divided into more folders as necessary:
- Administrative: This folder includes contracts, correspondence (including email when you download it), forms, invoices, and similar files.
- Project: Put the actual work of the project here. For a website redesign, you might put design files and text files.
- Clips/Kudos: Your samples or kudos from colleagues are filed here.
- Notes: Any project-specific notes, such as notes from meetings, go here.
- Graphics: Put any graphics specific to the project here.
The bigger the project, the more you want to organize that project folder. Each one might have several folders within it, such as stages for the project and one for old versions.
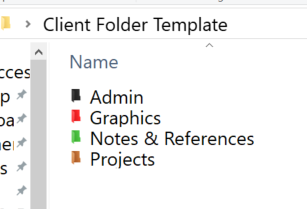
Within all top-level folders, the subfolders should be the same color. You could make administrative folders black, graphics folders red, notes folders green, and project folders brown, for example. The color will give you a visual clue as to what’s in the folder.
Duplicate the structure as much as necessary with your physical folders. Use the same naming convention and put a starting and ending date on the folder to help narrow your search in the future. For example, when I was teaching online courses, I kept backup paper records of my contract, student grades, and similar important documents. Each folder was labelled with the university name, course name, and semester and year. If I need to look up a student’s grade, as long as I know what course and when, I can immediately go to the right folder.
During the Project
During the project, allow your software to autosave the file as you work on it. When you close out of the file, back it up somewhere, such as on a thumb drive. Once a week, back up all your current files to a separate location, such as a cloud backup service or an external hard drive.
Add the date you backed up to the name of the top-level folder. This way you know at a glance which is the latest version.
Finishing the Project
Once the project is completed, Lagasse recommends holding on to files for six months and then deleting all of them except for the following:
- Final project files
- Notes files
- Any files you’re required to keep because of legal or contractual obligations
If the project has been through several versions or if more than one person has made changes to the files, also consider saving versions that show who introduced what changes.
The goal is consistency in structure and labeling. If you have a map, you know where to look first. And if you have to do a search, consistent names will bring up the right results. Setting up a structure at the start will give you every chance to succeed.
A version of this article originally published as part of “Honing Your Craft: Communication Central’s Annual Conference” in Copyediting newsletter (vol. 26, no. 1, December 2012–January 2013, p.1+).
One thoughts on “Structure Folders to Find What You Need”